Views: 0 Author: Site Editor Publish Time: 2025-09-11 Origin: Site
Ready to make your own beer at home? You just need some basic brewing equipment to get started. Homebrewing feels much easier than it sounds. You can find affordable gear, and you don’t need a fancy setup. Anyone can do it—yes, even you!
Begin homebrewing with simple tools like a brew kettle, fermenter, and sanitizer. You do not need expensive equipment to make good beer.
Clean and sanitize your brewing tools every time you use them. This stops germs and keeps your beer tasting good.
Think about what you want to do and how much space you have before picking equipment. Start with a few items and get more as you learn and feel ready.
Getting started with homebrewing is easier than you might think. You only need a few key pieces of brewing equipment to make your first batch. Here’s a quick look at what you’ll need and why each item matters.
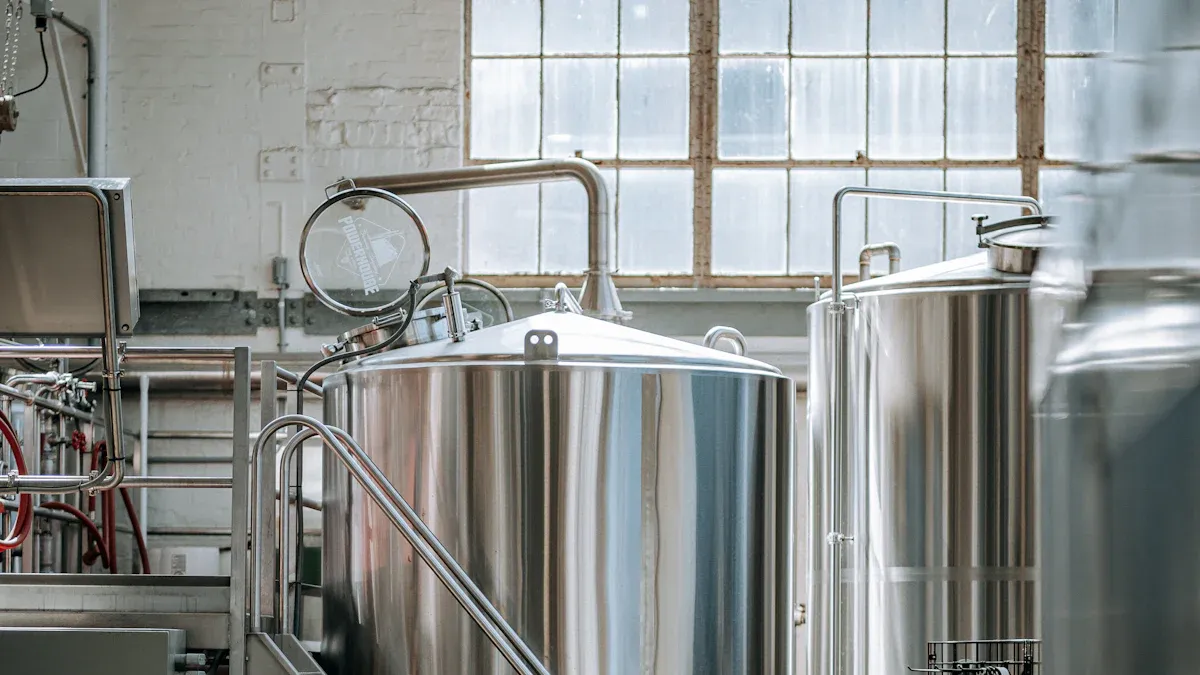
The brew kettle is where you boil your ingredients and start the magic. You can use a simple pot from your kitchen, but a dedicated brew kettle works best. The size should hold at least 5 gallons. The material of your kettle can change your brewing experience:
| Material | Advantages | Disadvantages |
|---|---|---|
| Stainless Steel | Durable, easy to maintain, resists corrosion | Costs more than aluminum |
| Aluminum | Lightweight, heats up fast | Can react with some ingredients, may affect flavor |
| Copper | Heats evenly and quickly | Needs regular cleaning to avoid oxidation |
Tip: Always clean your kettle with warm water and mild detergent after each use. Sanitize it before brewing to keep your beer safe and tasty.
The fermenter is where your wort (unfermented beer) turns into real beer. You can use a food-grade plastic bucket or a glass carboy. Both work well for beginners. Make sure your fermenter has a tight-fitting lid to keep out germs and air.
A good seal helps your beer ferment properly.
Cracks or poor seals can let gas escape and spoil your beer.
An airlock and stopper fit into the top of your fermenter. The airlock lets gas escape during fermentation but keeps air and germs out. This protects your beer from contamination.
If the airlock fails, you might lose beer or get off-flavors.
Clogged airlocks can cause messy blowouts, so check them often.
Always fill the airlock with enough liquid to block outside air.
You use a siphon to move your beer from one container to another without splashing or stirring up sediment. There are a couple of common types:
| Siphon Type | Advantages | Disadvantages |
|---|---|---|
| Auto-Siphon | Easy to use, primes with a few pumps | Sometimes leaks air, which can spoil beer |
| Sterile Siphon | Simple and reliable, less hassle | Not as widely available as auto-siphons |
Many homebrewers find the sterile siphon easier and more reliable. If you have trouble with air leaks, try switching to a sterile siphon.
Sanitizer is one of the most important pieces of brewing equipment. It kills germs and wild yeast that can ruin your beer. Use a food-grade sanitizer on everything that touches your beer after boiling. Clean and sanitize your gear every time you brew.
A hydrometer helps you measure the sugar in your beer before and after fermentation. This tool tells you when fermentation is done and helps you figure out the alcohol content. Just float the hydrometer in a sample of your beer and read the number.
Once your beer is ready, you need bottles and a capper to store it. You can use glass bottles with swing-top caps or regular bottles with metal caps.
Swing-top seals should be replaced every third or fourth use to keep them tight.
Check the seal by closing it on an empty bottle. If it closes too easily, it’s time for a new seal.
Quality bottles like Grolsch can last for years if you take care of them.
Note: You don’t need the fanciest brewing equipment to make great beer. Basic gear works just fine for your first batches. As you get more experience, you can upgrade your setup for even better results.
Do you want to make your homebrew even better? After you learn the basics, you can try some new brewing equipment. These upgrades can make brewing easier. They can help you make better beer. You can also try new beer styles with these tools.
A wort chiller cools your hot wort very fast. Quick cooling keeps your beer safe and tasty. With a wort chiller, you can cool wort in 20 to 30 minutes. This means your wort is not in the danger zone for long. It lowers the chance of germs getting in. Many homebrewers like this upgrade. It saves time and helps make better beer.
A secondary fermenter helps you get clear beer. When you move your beer to a second container, the sediment drops out. This step lets you try dry-hopping. Dry-hopping adds more smell and taste. Moving beer off the sediment stops bad flavors. It also helps your beer get better as it sits. If you want bright beer, try this upgrade.
Temperature is very important in brewing. A digital thermometer gives you exact numbers. You can always check the right temperature. Digital thermometers show the number on a screen. You can change the settings easily. They cost less now and work better than old ones.
| Feature | Digital Thermometer | Analog Thermometer |
|---|---|---|
| Precision | High | Low |
| Display | Digital readout | No display |
| Control | Adjustable | Limited |
Bottling is good, but a kegging system is faster. You can add bubbles to your beer in the keg. You can pour beer from a tap. Many brewers like this for parties and sharing. Brands like Blichmann Engineering and Ss Brewtech make good systems. You can buy these if you want the best gear.
Tip: You do not need every upgrade now. Try one or two as you get better. See which ones you like best.
You don’t have to spend a fortune to start brewing at home. Many beginners find that a basic setup costs between $350 and $500, depending on what you choose. Some people spend more, but you can keep it simple and still make great beer. Here’s a quick look at what you might pay for common items:
| Equipment | Price Range |
|---|---|
| Stockpot (Aluminum) | $20–$40 |
| Plastic Bucket | $10–$20 |
| Glass Carboy | $20–$40 |
| Propane Burner | $30–$60 |
| Ice Bath | $0 |
Tip: Start with the basics. Upgrade later as you learn what you like.

Not everyone has a big kitchen or garage. You can pick gear that fits your space. Plastic buckets and PET carboys stack easily and weigh less than glass. Small electric kettles work well in apartments. If you want to save even more space, try a turkey fryer kit. It combines a burner and pot in one package.
Stackable fermenters save room.
Choose compact burners or kettles for tight spots.
Store bottles in sturdy boxes under a table or bed.
Think about what you want from homebrewing. Do you want to make small batches or big ones? Do you care about speed or taste? Here are some things to consider:
| Factor | What to Look For |
|---|---|
| Capacity | Match size to how much beer you want |
| Material | Stainless steel lasts longer |
| Automation | Automated systems save time |
| Space | Make sure everything fits your area |
| Cost | Balance quality and price |
You can always start small and add more brewing equipment as your skills grow. Pick what matches your goals and your space. Homebrewing stays cost-effective if you buy only what you need.
You want your brewing space to feel safe and easy to use. Start by planning where you will put each piece of brewing equipment. Keep your kettle, fermenter, and tools close together so you do not have to walk around much. If you use a propane burner, set it up outside or in a well-ventilated spot. Pumps help move hot liquids safely, and food-grade pumps clean up fast. Group your tools by what they do. This makes each step simple and keeps your workspace tidy.
Tip: Lay out your gear before you start. Check that everything is clean and ready to go.
Follow these steps for your first batch:
Sanitize all your equipment. Clean everything that will touch your beer.
Steep your grains in hot water. Use a grain sock to keep things neat.
Add malt to the water after steeping. Stir well.
Boil the mixture and add hops for flavor.
Cool the wort quickly. Transfer it to your fermenter.
Pitch your yeast into the cooled wort.
Seal the fermenter with an airlock.
You can make great beer if you follow these steps and keep things clean.
Clean and sanitize everything after each use.
Write down what you do on brew day. Notes help you learn and improve.
Brew with a friend. It makes the process more fun.
Control your mash and ferment temperatures, especially in the first few days.
Do not worry about small mistakes. Most problems can be fixed if you stay clean and watch your temperatures.
Remember: Homebrewing is about learning and having fun. Relax and enjoy the process!
Keeping your brewing equipment clean and well-maintained helps you make great beer every time. You do not need fancy tools or harsh chemicals. Just follow a few simple routines, and you will keep your gear in top shape.
You want to clean your gear right after each brew day. This stops sticky residue from drying and makes your next brew easier. Here’s a quick cleaning routine you can follow:
Rinse your kettle with hot water to remove any leftover sludge.
Fill it with warm water and a brewery wash. Stir or recirculate for a few minutes.
Let it soak overnight if you see stubborn spots.
The next day, dump the water and rinse everything with fresh hot water.
For fermenters and chillers, soak them in hot water with brewery wash after each use. Always check for cracks or worn parts while you clean.
Cleaning removes dirt, but sanitizing kills germs and wild yeast. If you skip this step, you risk sour or funky flavors in your beer. Always sanitize your fermenter, siphon, bottles, and anything that touches your beer after boiling. Use a no-rinse sanitizer made for brewing. Clean first, then sanitize right before you use your gear. This keeps bacteria, mold, and other bugs away from your beer.
Tip: Immediate cleaning and sanitizing after each batch stops bacteria from growing and keeps your beer tasting fresh.
Store your brewing equipment in a dry, dust-free spot. After cleaning and sanitizing, let everything air dry completely. Moisture can cause mold or rust. Use plastic bins with lids or a tool chest to keep your gear organized and safe. Before you put things away, check for any leftover residue or damage. Disassemble parts if needed so nothing gets stuck or broken.
Safety first! Keep chemicals in a separate place and do not overload your shelves.
Leaks and spills can happen to anyone, but you can fix them fast. Always check your hose clamps and seals before you start brewing. Tighten any loose connections and look for cracks in rubber seals or O-rings. If you use a keg, a little keg lube on the posts helps keep things tight. Want to find a sneaky leak? Mix up some soapy water and brush it on the fittings. Bubbles will show you where the leak hides.
Quick Leak Fixes:
Check gas line clamps for tightness or damage.
Inspect O-rings for cracks or wear.
Make sure all fittings are fully seated.
Replace worn parts right away.
Test with soapy water to spot leaks.
Tip: If you spot a leak, fix it before you move on. Small leaks can turn into big messes!
Sometimes your beer tastes odd—maybe too sweet, sour, or just “off.” Most of the time, this comes from poor cleaning or temperature swings. Always clean and sanitize your gear after every use. Keep your fermentation temperature steady. If your beer smells funky, double-check your cleaning routine and make sure your yeast is fresh.
| Off-Flavor Problem | What to Do |
|---|---|
| Too sweet | Keep fermentation temperature steady |
| Funky or sour taste | Clean and sanitize all equipment |
| Cloudy or hazy beer | Use a fining agent or Irish moss |
You can fix most brewing gear with a few simple steps. Keep an eye on your equipment for signs of wear. Sharpen blades and check roller gaps if you mill your own grain. Service your cooling system and keep refrigerant levels right. Always follow the cleaning tips from the maker. If you use kegs, wash them well to avoid residue. Regular checks and cleaning help your gear last longer and your beer taste better.
Stay on top of repairs and cleaning, and you’ll spend more time brewing and less time fixing!
You can start brewing at home with just a few pieces of brewing equipment. Keep things simple at first. Upgrade your setup as you learn more. Anyone can make tasty beer at home. Enjoy the process and have fun with each batch you create!
You need a brew kettle, fermenter, airlock, siphon, sanitizer, hydrometer, bottles, and a capper. These tools help you make your first batch.
Yes, you can use a large kitchen pot. Make sure it holds at least 5 gallons. Stainless steel works best for easy cleaning.
Always rinse your gear after each use. Use brewery wash and sanitizer before brewing. Let everything air dry to stop mold and bacteria.


